Back again with my second DT project for BTC&G "Cute as a Button" challenge. For details of the challenge, prizes, rules etc please see HERE All the DT are looking forward to seeing your buttony makes!
Aren't buttons amazing? There is so much you can do with them apart from using them to fasten clothes. Here is a necklace I made from just cotton crochet thread and buttons
 I have made out a little tutorial in case you would like to make some button jewellery yourself. The only crochet basics you need to know are how to make a slip knot and how to make a chain stitch and this YouTube tutorial explains it very well...
You need:
A small amount of yarn
A needle that will fit through the button holes
A crochet hook
Buttons
For the example I used Aran weight yarn, a darning needle, a size 4mm hook and Boofle buttons.
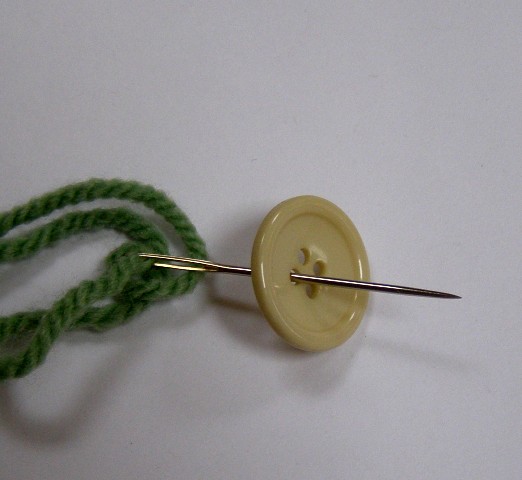
 Thread the darning needle with your yarn. Take a look at your buttons. You will see that most of them have a definite back and front. Pass the darning needle from the back, through the hole...
 and back down through the button from front to back...
 This is what it should look like. It dosen't matter whether your buttons are 4 hole or 2 hole....then push the button down the yarn towards the ball...
 Keep going, adding more buttons. Always add more than you think you need for your project to allow room for manouver!


Push the buttons down towards the ball of yarn
 Here comes the actual crochet bit...refer back to the YouTube video if you get lost
Make a slip knot and a few chains to start off
 Push the first button up tight against your hook (and the last chain you've made)
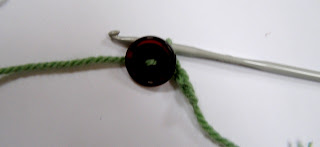 Try to ignore the button and carry on making chains...
 This is what it should look like (Please excuse the state of my fingers. I do a lot of gardening!)
 Crochet on, placing a button every 3 or 4 chains (or wherever you like). Stop when your work is long enough to go around your wrist for a bracelet or as long as you want for a necklace. To end off crochet enough chains to make a loop that will slip over your first button....


If you have any questions or need some help leave me a message in the comments section and I will try and help you.
Thanks for puting up with my crochet obsession!
Ger x
Aren't buttons amazing? There is so much you can do with them apart from using them to fasten clothes. Here is a necklace I made from just cotton crochet thread and buttons

You need:
A small amount of yarn
A needle that will fit through the button holes
A crochet hook
Buttons
For the example I used Aran weight yarn, a darning needle, a size 4mm hook and Boofle buttons.


For variety you can stack 2 buttons on top of each other and sew through them....

Push the buttons down towards the ball of yarn

Make a slip knot and a few chains to start off


Darn in the loose ends and here is your button bracelet!

Thanks for puting up with my crochet obsession!
Ger x


